


In this post, we’re going to explain how AirTag integration with Home Assistant works, so you can track your items from your lovelace panel and your automations.
Índice
Requirements
First let’s review what you’ll need to achieve AirTag integration with Home Assistant:
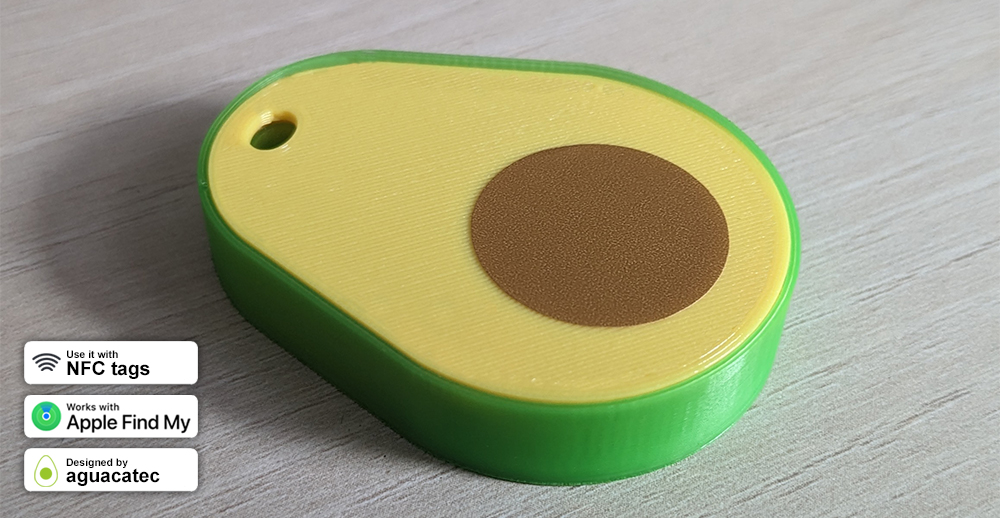
- This “integration” will work for both official AirTags and other compatible devices with Apple’s “Find my” network. In fact, I’ll be using these cheap clones.
- You’ll need an Apple device (iPhone/iPad) to set up and sync the trackers (at least at the beggining). This device must be always online as it will be the one sending location information to Home Assistant. From here, the AirTag position can be checked from any device, whether Android or iOS.
- Both the Apple device and the “client” devices must have the Home Assistant app installed.
- You can also print our ‘aguatracker’, which also incorporates NFC inside to open doors or use it in your automations.
Get the AirTag location from the Apple device
To get the AirTag or compatible devices location, you need to run the “Find My” app from an Apple device. This is exactly what we are going to do to achieve AirTag integration with Home Assistant by using a shortcut, with the aim of sending the information to HA and being able to manage it from there.
- In Home Assistant, go to Settings > Devices and Services > Helpers > Create Helper > Text. Name it “AirTag,” assign a maximum value of ‘255,’ and create it. This will set up the entity ‘input_text.airtag’, which will store the information sent by the iOS device.
- From the iOS device where you have sync your AirTags, open the “Find My” app and rename the devices, placing an asterisk (*) at the beginning of the name of each object as you can see here.
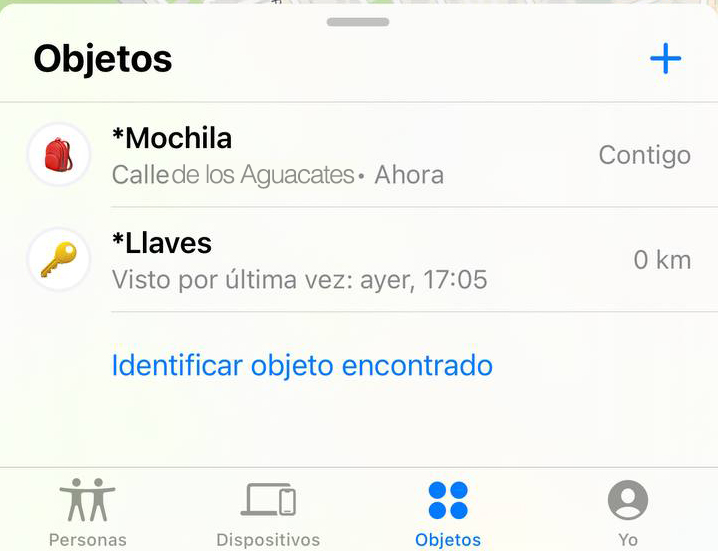
⚠️ By default, the map takes up 60% of the iPhone screen, so if you have more than 3 AirTags, the other devices will not appear in the shortcut's preview. A trick to overcome this obstacle is to swipe up from the bottom to expand the list of items and then exit the "Find My" app. When the shortcut is executed, it will display the expanded list just as you left it.- With this iOS device, click on this link to import the shortcut that will send the information to HA, and tap on the three dots in the upper corner to edit it.
- Look for the “Call” action with the Home Assistant icon and tap on the arrow icon to expand the details. In the “Server” section, you must select your Home Assistant instance to send the data.

- When you run the shortcut, you’ll notice that it opens the “Find My” app, performs a series of commands to extract and isolate the information from the AirTags, and finally sends it to HA as the value of the helper we just created.
⚠️ The shortcut has been optimized for iPhones. If you want to use an iPad keep in mind that, due to its larger screen, it will also capture information from the map that you're not interested in (streets, squares, etc.). To make it work correctly, add an additional step for "Crop Image," just after taking the screenshot and before extracting the text from it.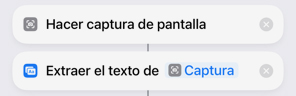
Working with the data
We now have raw information provided by the iOS device available in Home Assistant (you can verify how it looks from Developer Tools > States, searching for the entity “input_text.airtag”). You’ll likely see something similar to this:

Next step is to achieve AirTag integration with Home Assistant is to work with this information to create a sensor for each item, to complete the address provided by the application, and to get the coordinates of that address. By the way, you should consider that the “Find My” app may display information in different ways:
- “Home” – This appears when you have set your home address in the app, and the device is there (the same would happen if you had identified other known places, such as “Work”).
- “Street…” – When the device is at an unknown place, it will indicate the corresponding address.
- “Last Seen…” – We will see this when it has been a while since the device sent its location for the last time.
Sensors in Home Assistant
Follow these steps to create the sensors in Home Assistant:
- Go to Geoapify website and click on “Get started“. Then scroll down to the bottom of the page, click on “Get API key,” and either sign up or log in with your Google account.
- Click on the “Create a project” button and type any name you want (ie, “Aguacatec”). Copy and save the code listed in the “Key” field.
- Copy the following code into your ‘sensors.yaml’ file and make the following adjustments:
- Replace the word “ITEM” with the name of the item you want to track (ie, “backpack”).
- Set the value of the ‘scan_interval’ field to the time in seconds for updating the sensor’s coordinates (it’s logical for the frequency to be equal to or greater than the period in which you run the Apple shortcut).
- Replace the word “ITEM_FINDMY_NAME” with the exact name assigned in the “Find My” app on your Apple device (ie, “Red Backpack”).
- Replace the word “HOME” with the exact word assigned in the “Find My” app on your Apple device when the item is at home (ie, “Home” or “Casa”). By the way, note that you could do the same if you have other known locations (like “Work”).
- Replace the word “FULLADRESS” with your home address (ie, “77th Alcala Street, Madrid”). We will take the coordinates from this address when the “Find My” app reports that the AirTag is at home.
- Replace the word “YOURAPIKEY” with the code you get in the previous step.
- Replace the word “STREETNAME” with the name of your street, so the sensor will show that the device is at home, even if there is a slight variation in the coordinates. By the way, you can specify a different “home” or base for each device (ie, for a bike you have in other place).
- Replace the word “FIXADDRESS” with the name of your city or your country (ie, “{% set fix = address + “, Madrid, Spain” %}”), if you want limit the results of the given addresses. This way you can avoid wrong matches of places with similar names in another city or country. Otherwise, just leave it empty ({% set fix = address + “” %}).
- platform: rest
  name: airtag_ITEM_geo
  value_template: "{{ value_json.results[0].formatted }}"
  json_attributes_path: "$.results[0]"
  json_attributes:
    - lon
    - lat
  verify_ssl: true
  scan_interval: 900 # every 15 min
  force_update: true
  resource_template: >
    {% set address = states('input_text.airtag').split('ITEM_FINDMY_NAME')[1].split('•')[0] %}
    {% if address == "HOME" %}
      {% set home = "FULLADRESS" %}
      {{
        "https://api.geoapify.com/v1/geocode/search?text="
        + home | urlencode
        + "&apiKey=YOURAPYKEY&format=json"
      }}
    {% else %}
      {% set fix = address + "FIXADDRESS" %}
      {{
        "https://api.geoapify.com/v1/geocode/search?text="
        + fix | urlencode
        + "&apiKey=YOURAPYKEY&format=json"
      }}
    {% endif %}

- platform: template
  sensors:
    airtag_ITEM:
      friendly_name: "ITEM"
      value_template: >
        {% set home = "STREETNAME" %}
        {% if ":" in states('input_text.airtag').split('ITEM_FINDMY_NAME')[1].split('•')[0] %}
        {{ states('input_text.airtag').split('ITEM_FINDMY_NAME')[1].split('•')[0].split(',')[0] }}
        {% elif home in states('input_text.airtag').split('ITEM_FINDMY_NAME')[1].split('•')[0] %}Home
        {% else %}
        {{ states('sensor.airtag_ITEM_geo') }}
        {% endif %}
      attribute_templates:
        latitude: >
          {% if ":" in states('input_text.airtag').split('ITEM_FINDMY_NAME')[1].split('•')[0] %}null
          {% else %}{{ state_attr('sensor.airtag_ITEM_geo','lat') }}
          {% endif %}
        longitude: >
          {% if ":" in states('input_text.airtag').split('ITEM_FINDMY_NAME')[1].split('•')[0] %}null
          {% else %}{{ state_attr('sensor.airtag_ITEM_geo','lon') }}
          {% endif %}
        status: >
          {% if ":" in states('input_text.airtag').split('ITEM_FINDMY_NAME')[1].split('•')[0] %}unavailable
          {% else %}available
          {% endif %}
        last_update: "{{ as_timestamp(states.input_text.airtag.last_updated)|timestamp_custom ('%d/%m/%Y %H:%Mh') }}"
      icon_template: mdi:bag-personal
⚠️ Keep in mind that, although I have identified in UPPERCASE the parts of the code that you should modify, sensor IDs (ie, "airtag_ITEM") and entities IDs ("sensor.airtag_ITEM_geo") should always be indicated in lowercase.- Restart Home Assistant (reloading configuration is not enough).
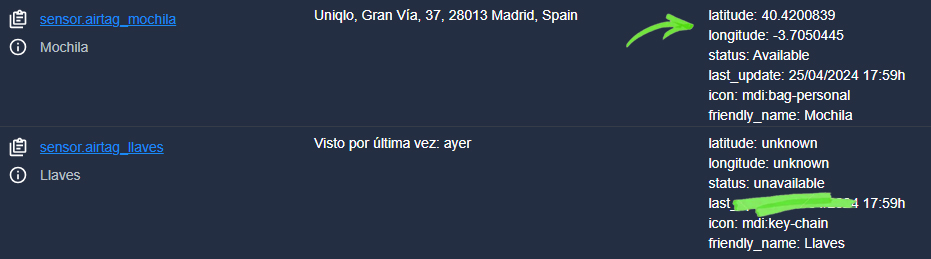
- Go to Developer Tools > States and check that you now have the entity ‘sensor.airtag_ITEM’ available and its state is AirTag location (and some attributes related to its location). Otherwise, if it has been a while since the tracker sent its location, the state will indicate when was the last time it was “seen”. All this information is now available for you to use in your cards or automations.
Device tracker
Optionally, with AirTag integration with Home Assistant you can create a device tracker from previous sensors. This will allow you to generate automations when the device get into a geographical zone, or it leaves it. To do this, follow these steps:
- If you don’t have it already, create a file called ‘known_devices.yaml’ inside your “config” folder.
- Copy the following code and replace the following:
- Replace the word ‘DEVICE_ID’ with the exact text found in the ‘friendly_name’ attribute of the sensor you consulted in the last step of the previous section. Type it in lowercase, and replace spaces with underscores (‘_’). For example, if the ‘friendly_name’ is “AirTag Backpack,” you should indicate ‘airtag_backpack.’
- Replace the word ‘DEVICE_NAME’ with the name you want to identify your device (for example, “AirTag Backpack”).
- Replace the icon and picture of the device tracker as you prefer.
- When you are done wtih the code, restart Home Assistant.
DEVICE_ID:
  name: DEVICE_NAME
  mac:
  icon: mdi:bag-personal-tag ## Replace this icon with the one that represents your item.
  picture: local/images/mochila.png ## Replace this path with the one to the image that represents your item.
  track: true
- Now click on the following button to import the blueprint I have made. You will see that the configuration is very simple, you just have to select the sensor you view in the last step of the previous section (ie, ‘sensor.airtag_backpack’), save and restart Home Assistant. The blueprint will update the coordinates of the ‘device tracker’ every time the AirTag sensor is updated.

💡 You can use the blueprint to configure as many AirTags as you want!- Now you’ll also have the entity ‘device_tracker.ITEM’ available, which you can use in your maps and automations. For example, to get a notification when an AirTag leaves the “Home” zone.
How to update the coordinates
Once we have finished AirTag integration with Home Assistant, we must ensure that we can update the information when needed. Although the best way to do this will depend on your needs and circumstances, below we will see some use cases and how to implement them. In any case, you should consider the following:
- Update requires running the shortcut on the device (iPhone/iPad) where the AirTags are sync. In order to do it, the device must be powered on and unlocked.
- The shortcut runs in the foreground, which means that if the user of the Apple device is using it at that moment, their activity will be interrupted for a few seconds.
- Shortcuts can be run manually or through automations set up within the “Shortcuts” app itself (ie, at a certain time of day). Additionally, depending on the iOS version of the device, for certain triggers, you can define it to run without user confirmation (if the device is unlocked).
Since iOS 14, you can run automations without confirmation based on the time of day, an alarm, sleep mode, connection with CarPlay, workout mode on Apple Watch, NFC contact, opening an app, enabling airplane mode, do not disturb mode, or low power mode, battery level, or connection with the charger. You can check what other types of automations (such as receiving an email or hearing a sound) have been added in higher versions at this link.With this in mind, I believe that the ideal update method depends on the use you will give to the AirTag.
If you use them “just in case”
In a large percentage of cases, we don’t need continuous monitoring, but it’s good to have an AirTag just in case we lose an object (ie, our keychain). Hopefully, you’ll never have to use it, but if you ever need to check its position, you would simply request the location update from the Apple device.
Any user with access to Home Assistant can do this by sending a notification like this one, which you can customize and launch it from a script or from your lovelace dashboard.
service: notify.mobile_app_APPLE_DEVICE
data:
  message: Where are the AirTag?
  data:
    shortcut:
      name: AirTag to HA
When the user of the device gets the notification, he/she just has to tap on it and wait a few seconds to send you the information.
🏠 Apple device must have Home Assistant app installed to get the notification, so it will be a suitable option when it comes to a trusted person in your environment, such as a family member.If you use them in your daily life
I can think of many cases where AirTags can be helpful in everyday life together with our routines. In this case, it’s desirable for you to be the Apple user to automate your routines, so you can take advantage of moments when the device is unlocked, but running the shortcut is not a hassle. For example:
- If you drive the car every morning and you connect your iPhone to CarPlay, you can run the shortcut while driving. On the other hand, with Home Assistant, you can set up automations to alert you if you’ve forgotten your laptop bag at home, or if it’s certain time and your kids haven’t left for school yet. You can also run it on the way back to see if your family has already arrived home, or else receive a notification to go pick them up.
- If you like to check from time to time that everything is in its place (your van, your bike, your surfboard…), you can run the shortcut every time you charge your device. If any of your prized possessions have moved, Home Assistant will let you know.
- If you’re one of those people who needs an alarm to wake up or to remember to take the dog out, you can take advantage of running the shortcut right when you unlock the phone to turn off the alarm.
If you need continuous tracking
There are times when updating from time to time is not enough, but we need to monitor the position continuously and proactively for this tracking to make sense. For example, if you are traveling and you are worried about losing your luggage or having your car stolen, you will want to know it if any of them has moved as soon as possible, so you have the chance to get it back.
Otherwise, it may be too late to recover them since they could lose signal at some point or be neutralized by whoever took them. Additionally, keep in mind that once the location reaches, for example, a residential building, the authorities will not be able to enter without a court order to search them.
In these cases, I highly recommend using an old iPhone or iPad and leaving it at home during your trip. You just need to make sure to leave it connected to the power, with the screen permanently active and unlocked, and schedule an automation to run the shortcut at short intervals (ie, using the time of day). Create an automation in Home Assistant to send you a notification, for example, when its position changes as long as it does not matches yours (because it is you who is moving it).
¿Dudas?¿necesitas ayuda? entra aquí
Y si te ha gustado, compártelo! 🙂